Wednesday, August 24, 2011

Alter The Way You Wear It

Sometimes alterations can just mean altering the way you would normally wear something. Just because the vintage dress comes with the vintage jacket, doesn't mean you have to wear them together. Just as a vintage top and skirt should not be paired together anymore.

I found this great shorts dress suit at the thrift store, and it reminded me of this Pretty Woman outfit Julia Roberts wears in the end of the movie:


Now, we have just been talking about not necessarily wearing two pieces together just because they came that way. So what happens when we break the suit apart?


Awesome high-waisted modern shorts!

Short suits are a great way to find longer high waisted shorts! Maybe we will have to find a way to alter the blazer so you can wear that separate too :)

Tuesday, August 23, 2011

Dress to Collar Tie Shirt Tutorial

Matt loves to laugh at my "pioneer" dresses, his term for anything made before 2000. He thinks he is so witty and clever {and don't tell him I said this, but a lot of the time he actually is}, but "pioneer" dresses make the best projects and there are always a plethora at your nearest thrift store because...well, no one wants to look like a pioneer {or polygamist, as Matt also puts it, so kindly and politically correct}.

And speaking of pioneer dresses, here is one that I altered today, along with the tutorial for those who think it fits their style :) This alteration took about 1 hour and 30 minutes in total.


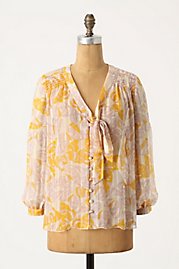
Here's what you start with...


And the prize you get in return!

So first things first:

1.  Cut the dress to make your top. Make sure you do not cut this too short, in fact, leave a little longer than desired because you are going to hem it after which will take up the length.

2.  Hem it. I also took up the sleeves because they were too long. You can choose to do this, or if you chose right, you might not have too. 


3.  Cut your collar and pocket {if you want the pocket}. This can be done with the left over fabric from the dress, or you can choose another fabric to contrast the look. That is what I chose with the stripes fabric.


The strip should be about 5 inches x 60 inches. If you would like to be able to tie it in a bow, instead of just hanging like I have, you should make it a little longer. 


4.  Fold the strip with face sides together and sew all the way down the length of the strip. 


5. Turn the strip inside out.


6.  Now fold the ends in making a slight slope so one side is longer than the other, and then sew it together. 


7.  Now you have your collar! Just iron it so it is flat and will make it easier to sew and will look nicer as your collar. 


Now the pocket:

8.  Bend the top part of the pocket down with face sides touching. 


9.  Fold it over again so that it makes a neat edge, and pin it so it stays while you sew the edges. 


10.  Turn the pocket over to the back side, bend the edges over, and sew them to make a nice and neat pocket from the front. 


11.  I sewed a button on mine, which I took from the left over part of the dress. 

12.  Then sew the pocket onto the shirt. 


13.  Now you are ready to sew the collar on. Place the face sides together and sew them together along the edge. 


Voila! You finished your very own tie collar shirt. Now you are style par with Anthro and Modcloth, congrats :)


Saturday, August 20, 2011

Antique Your Own Dresser {or anything really}


So this is what I started out with. I am very grateful for the sweet lady who gave this to us for free. It just needed a little fixin up since the handles were missing, and I thought what a great project to make this really fun and brighten up our bedroom. 

So I dragged Matt to Lowe's. It is rare when a women has to drag her man to a hardware store, but we are very unconventional that way. My mom taught us girls if we wanted it done, we could do it ourselves, we didn't need a guy to do everything. Not to mention my dad is a cute computer nerd who, for the most part didn't really know what he was doing. And now I married a school nerd who is brilliant...except for anything that has to do with manual labor :) Anyway...back to the project!


First you want to sand what you are painting, especially if the original paint had a glossy texture.


Taking everything apart makes it a lot easier to sand and paint.


After you have sanded, paint everything the color of your choice. The pain I chose was from Lowe's, and is called Valspar Indoor Satin Finish; the color is Golden Avocado. {Yes, I am quite aware it is very bold}. I got the smaller container of pain that cost about 15 dollars, and it was able to finish a dresser, mirror and two large bedside tables. If that helps you know how much to get. 


Ok, after it has finished {if you want it to have an antiqued look} you can get an antiquing glaze from Lowe's as well, or probably other places, but that is where I got it. There was only 1 choice there, but it worked really well. 

You can use the instructions on the glaze, but I will tell you how I did it so you can see how easy it is.


This is how the dresser turned out with the antiquing glaze. 

You just wet an old rag so it is barely damp. Then dip the cloth into the glaze and rub it onto the surface in round sweeps to make sure you get it all over. Then you can use the part of the rag that is still damp and clean to wipe off excess if you want it to be subtle. It is all up to your tastes. 


So here is the dresser finished. You can't tell how bright the color is in this pic because I took it inside our room, but I also painted our bedside tables with the Golden Avocado, and this is an accurate picture of the yellow in this pic:


Yay! I love bright colors :) As for the handles on both the dresser and bedside tables, I got them at Hobby Lobby with my 40% coupon {I drug Matt there too to make my coupons go further. What a good sport}.

There ya go! Such an easy process...maybe not as easy on the work aspect, but definitely worth it when I got the finished project. And I was right, it did brighten up the room. 

As for the cost: The paint, cabinet paint roller, antiquing glaze and all the handles cost about 35 dollars. Not to shabby!

Wednesday, August 17, 2011

Comfy Skinnies Tutorial


This was a question from a wonderful reader of my other blog, and I thought this would be the best place to answer it because I have a feeling she is not the only one with this question :) 


"I was wondering if I could get your help. I am in a RUT. I found you through a Mormon Fashion Bloggers link...so I assume you are Mormon? I try to dress modestly around the house....but it is tough to have casual clothes that are knee length. Do you have any suggestions on this?"


I actually have a really great idea for this {ok, the idea came from J.Crew, but I will take the credit of being inspired by it}


{Jcrew.com}

How great are these sweatpants? Totally comfy and you can wear them lounging {and look hot}, or out on the town with some heels {and look hot}. Win win, and all around comfy. 

So here is the tutorial of how to make them:


1. Grab some sweat pants. I didn't have any that would work, so I got some at Walmart on sale. I put the sticker picture so you could see exactly what I got in case you want to go that route. 

2. Lay them out flat...


Once you finally get them flat with the inside seam perfectly lined up {the outside seam won't line up because they allow extra fabric on the back of the leg for your buttocks region}, it's time for step 3. 


3.  This is the uber easy way to do it, but it does require you to have a pair of great skinnies that you love, and that fit well. You just overlay the skinnies over the sweat pants. I had a line down the front of my sweats so I had to line mine up perfectly so the line is down the middle when they are finished. 


4. Pin along the outside of your skinnies.


Now take the skinnies off and sew along the pin line. 


5. After you have done that for both of the inside of the legs and outside, cut off the excess fabric.

Voila! Try on your new comfy and awesome pants!

Here's how mine turned out. Basically I have to say that I love them because I get to wear sweatpants, but look sexy all at the same time :) 


Now if only my legs were as skinny as the model's in the J.Crew picture...sigh...ah well, as my mama always said, "you go great birthin hips!" I will just learn to take pride in that :)


Tuesday, August 16, 2011

Speaking of Tie Collar Shirts

I found this awesome shirt at the thrift store just a short while ago:


It was about 5 sizes too big, but since it had great fabric and the tie I thought I should grab it. Plus, never let something that is too big stop you from getting it! One of the easiest alterations you can do is just to take something in. 

Since we are talking about taking things in, we will first talk about how I took this shirt in. All you do is turn it inside out and pin along the seam, however many inches you need taken in. Follow the seams curves so that you keep the shape of the shirt, but making it smaller. 

Follow that seam from the bottom of the shirt all the way to the end of the sleeves {because if the shirt is too big, chances are the sleeves are a little big too. These ones were}. Now because the shirt was so big originally, the sleeves were really long, still, after I sewed it in, so I just roll them up :) 

Ideas, inspiration and more for thrifting


I have mentioned before, to just about anyone that asks, that I love to browse shops like Anthropologie, Modcloth, and Ruche for ideas when I am thrifting or altering anything. The reason why is because they all have a slight vintage touch to everything that they make, and there are TONS of vintage items at the thrift store to browse through.

The problem, some vintage items should be left on the shelf, so how to know which items to grab and which ones to never where again? This is where browsing comes in. Pick your favorite store and just browse their clothes online, or pick your favorite magazine and cut out pictures that you like, for whatever reason.


Recently this dress caught my eye. Keep up with my Thrifty Alterations facebook page where I will often post items that have inspired me, and just might inspire you!


Sunday, August 14, 2011

Tie Collar Shirts

I couldn't help but write a little advice for shopping thrift stores. So here it is:

Tie collar shirts!!

Basically every older woman sends her 1970's tie shirts to her nearest thrift store and they are ripe for the picking. Or at least for a short time until every girl out there realizes she can get them there for really cheap. And speaking of, all you girls in Norman, OK better lay off!...ok, maybe I can share a few.

Here are few from Anthropologie that are uber expensive. Mostly I just show you these pics so that you know I am not off my rocker when I start telling you to buy 1970's shirts from the Goodwill.


{Anthropologie.com}


{Anthropologie.com}

How fun is the yellow one?! I am really into fun designs lately....which will lead to another post, shortly, about watching out for fun patterns and what to do with them.

Here is a 1970's tie collar shirt that I found at my local thrift store. And I am going to shamelessly announce that it is for sale on my Etsy shop for much cheaper than you will find at Anthro.


Isn't it awesome?! {of course she is going to say that, she is trying to sell us something off her site}. Ok, but really it is.

Grandma Skirt Alteration

The grandma skirt, basically anything that is floral and calf length. The best part about them? They can be found and practically ANY thrift store at ANY given time. If you are looking for a great skirt, grab one that fits and let's make it work.

Here are my inspiration pics from skirts found at Modcloth.com


{Modcloth.com}


{modcloth.com}

And here is what I was able to do with my grandma skirt:


This is so easy to do! Unfortunately I do not have a before picture because this was before I thought of this wonderful blog. However, you can pretty much just picture it about 4 inches longer.

This is the easiest alteration you can make. You just take up the skirt a couple of inches so that it is just above you knee {or wherever you want it}.

Now you have a fashionable comfy outfit so a hot summer day. The skirt is long enough that you don't have to worry about it all day, and you can put it over any ole tee. Then just do a classic 60's ponytail and you look like you are just naturally fashionable, which you are.

The easiest way to hem this up is to hand sew a hidden stitch. If this reference just blew your mind, here is a video to show you how to do it! She is really easy to understand, especially for you beginners. Learn something new today.

What This Blog is About

Here is an overview of this blog:

Basically, I love to thrift. Mostly it started because it was cheap, but then I realized how amazing the vintage items were and how similar they were to stores like modcloth and Anthropologie, without the high cost and with more personality (because let's face it, these clothes have stories!).

Even after recognizing all their potential, I still noticed some would be even more fun with a couple of alterations. And this is where the blog comes in. I want to be able to share my alterations others. Finding ways to be thrifty together, and giving ideas to you crafty ladies about what can be done with simple clothes found at your local thrift store or vintage shop {if you live in Oklahoma, if definitely want to check out Elusive. SO cute and SOO cheap!}.

It all sounds great, right? So here's the problem, or would be if I cared much:

1. I have a super crappy camera, one that I have to tape shut. So don't be expecting amazing pictures because, well, let's face it, unless this blog blows up with followers, i'm not going to be getting a nicer camera. And honestly, I may be exaggerating slightly {not about the tape}, and my photography skills more than make up for...or at least my ego tells me it does.

and,

2. If you followed my previous blog, you will notice that the majority of my outfit pics are taken from my backyard. YES, I know that it is not always the best backdrop and, NO, there is not much that can be done about it. My sweet, kind, and usually selfless husband has a limit. Not only has he informed me that he should be paid with all the time he puts into taking pictures, but convincing him to put in more time with traveling to somewhere awesome, with an amazing backdrop is really pushing it.

But don't fret, I also have a really great bestie out here who I might be able to convince occasionally to take pics if I can pay her in Sonic diet cokes.

So there is the low-down. Stick with me and we will be thrifty partners with amazing clothes and your alteration skills will grow significantly...all as long as you can handle amateur pictures...he tries, he really does.

Enjoy!!